Do-It-Yourself Washout Booth for Screen Printing
I've seen several tutorials on building a screen printing washout booth online using an old shower and building a wooden structure around it. This is fairly inexpensive if you're able to find an old shower stall. I looked all over my local area and could not get my hands on one so I thought of using a 55 gallon plastic barrel, setting it on its side, cutting a hole to allow a screen to fit inside of it. However I was soon realizing that the size wasn't going to be quite big enough so I went with option #2.

This is a 135 gallon poly container that comes with a ball-valve drain and a aluminum cage to support the container when full. I found it on Craig's List for $90 and thought it would work perfectly with some modifications. I did my best to take snapshots throughout the process. I used my iPhone camera so the quality isn't that great. You can get the full-size images by clicking on the thumbnails themselves.

The first thing I did was remove the top two bars of the cage holding the container using a 5-point star-head screwdriver. Since the cage tapers downward, it slid out relatively easily. This is the cage upside down with a metal palette fastened to the tray.

I removed the metal palette using the same star-head screwdriver as before and set it aside.

I flipped the tray over and reattached to the base using hex bolts, nuts and tension washers. The star bolts were fairly worn down and were screwed directly into the metal palette which we're not using anymore. This will be the base in which the container will sit on top.

What was apparent very quickly was the height that the container would be sitting, it's far too high for general use. So with a reciprocating saw cut off the bottom two rungs which took off almost two feet. The aluminum is light so it didn't take much to saw through it. I cut the bars at an angle from the base to keep sharp edges at a minimum. I kept the leftover cage close since I'd be getting right back to it.
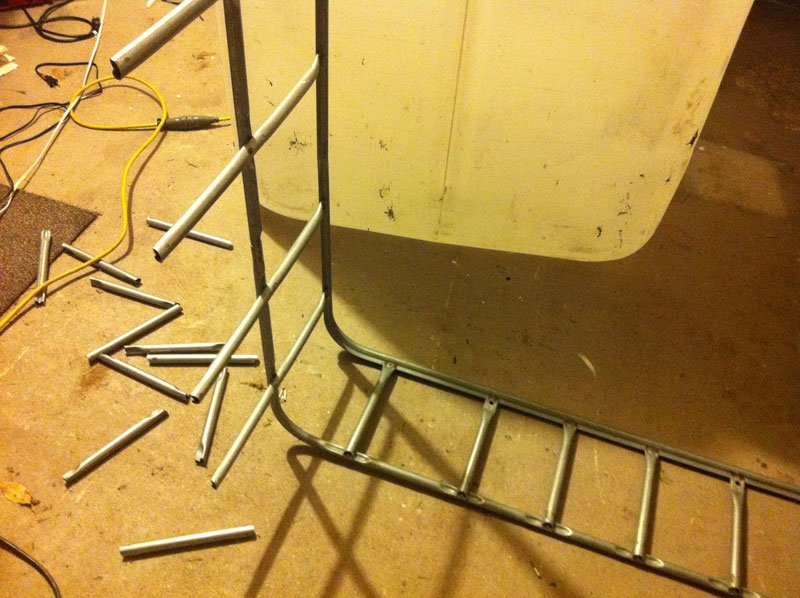
I cut the bars off of the leftover cage (again at an angle) to leave a single band of bars which will be used to support the container while on the base. I was able to use one single metal blade on the reciprocating saw on all of the bars which helped keep cost to a minimum.

The tray that will hold the container has a small lip that the cage fit on when flipped over; this allowed for the leftover band to slide nicely onto the tray creating a little support for the container without getting in the way. It fit snug enough to not need to be fastened down, but you can if you feel you need to. It will require some drilling and additional bolts, nuts and washers.

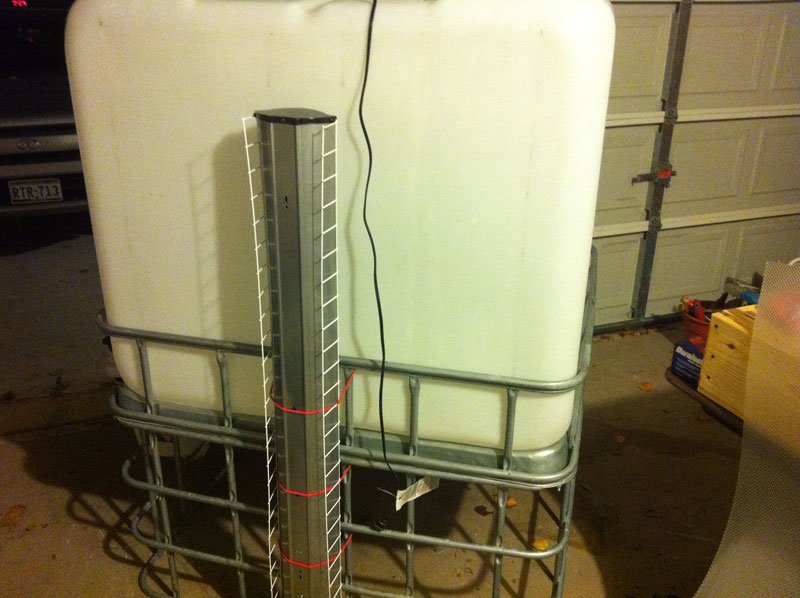
This is how the container looks sitting on the tray. Take note of how high the support beams reach up on the container.
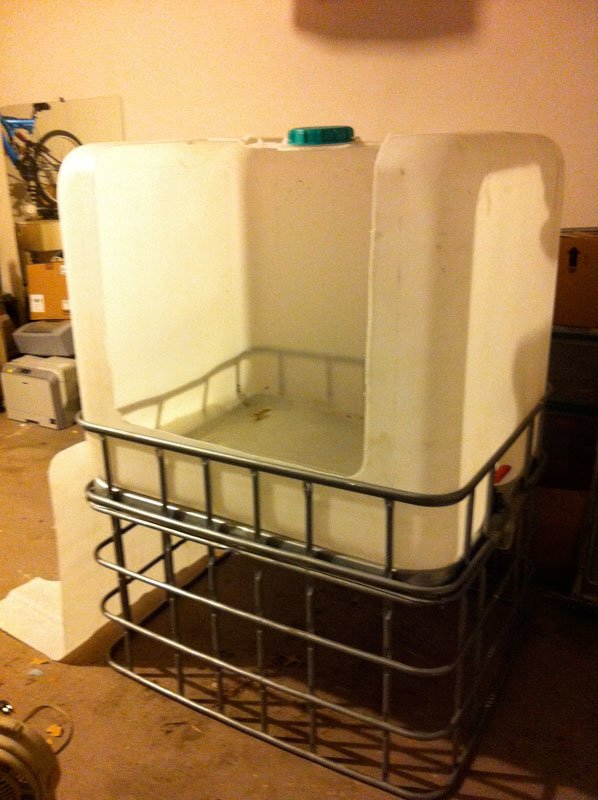
Using both the reciprocating saw and a dremel tool for the corners, I cut out the top and the longer side and the corner between them. I left the lid and a little around it so it can hold a bug light on top when working in a dark room environment. From the start to this part took a total of about an hour and a half. With the reciprocating saw it sped up the process. If you have a skill saw, it would take even less time to cut the corners from the container. I only had a Dremel tool so I put to use with what I had.
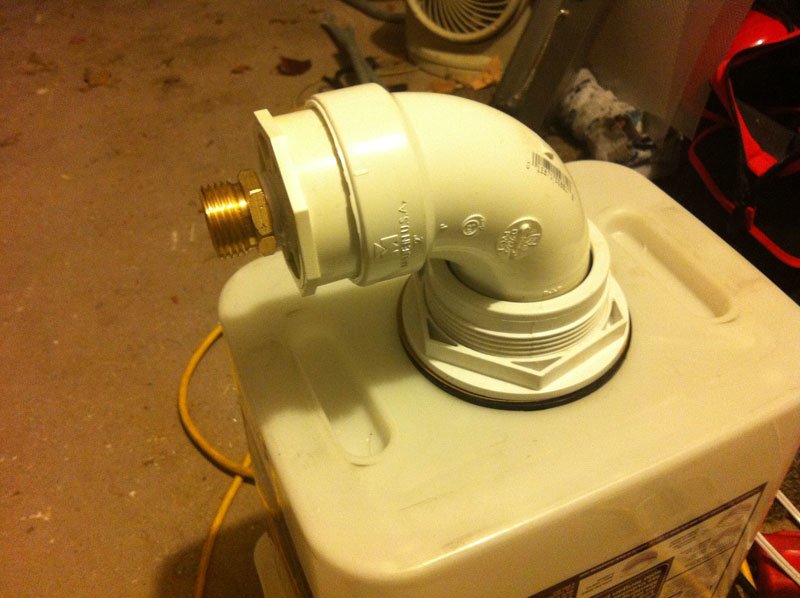
The emulsion that gets sprayed away while reclaiming screens can get pretty nasty. I do have direct access to the drain which i don't think would be possible to clog with the emulsion, but for safe measure I made a simple filter to catch some of the big stuff. I took the advice from several other do-it-yourself'ers and took a cat litter bucket (I had to search for one as I don't have a cat, my next-door neighbor graciously obliged), cut out a hole at the bottom and installed a shower drain to the bottom along with a 90° elbow and an adapter that allowed me to attach a garden hose to the end.
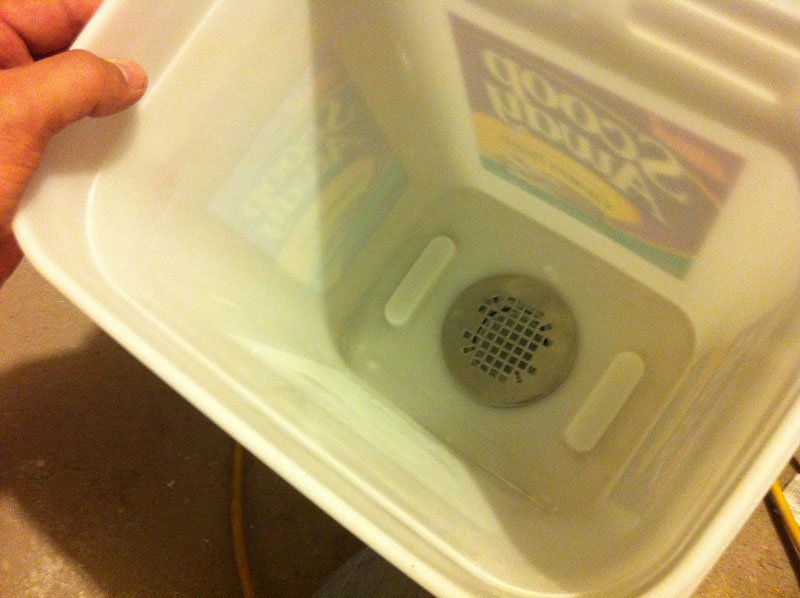
This is a shot of the inside with the shower drain installed.
What is nice about using a container instead of a shower stall is that the container is slightly translucent as opposed to completely opaque. With a couple of small bungie cords I attached a 48" dual-bulb flourescent light to the back of the booth. This will allow light to shine behind the screen so I can ensure the screens are completely clear of debris while reclaiming. It's light enough to be suspended without having to sit on the ground.

I found a nice basket in the garden/pond area at Home Depot that fit nicely in the filter. The holes are small enough to catch the larger debris, but large enough to where it won't get clogged easily. If I find it's too porous, I'll add some screen which I've seen being used in other posts.
I also added a 90° 2" pvc elbow and a threaded adapter which fit perfectly onto the ball-valve drain. With the base made entirely of bars, attaching the filter only needed a budgie cord. I did have to cut out the horizontal bar from the support cage to allow for the drain to fit through.

A shot of the completed booth with bug-light in place of the lid. I have two hoses, one for the filter to go out to the drain and the other to attach to the outside faucet.

And a shot with the washout booth backlit with the flourescent lights. The camera is compensating for the brightness; it is very well lit.
I hope this is useful to you. I read through a lot of forum threads from people wanting an inexpensive alternative for a washout booth before I came up with mine. It's definitely not the smallest washout booth out there, but coming in less than $200 (including the reciprocating saw) I thought it was a great solution. Happy modding!